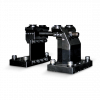

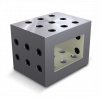
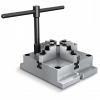






An angle plate is one of the simplest fixtures in the shop: two faces held at 90 degrees. That simplicity is why so many setups go wrong. It looks square, it bolts down in a minute, and nobody checks it until the first part comes off the machine with a perpendicularity callout out of tolerance.
This angle plate machining setup guide covers how to prep the plate, mount and indicate it on a vertical machining center, use it on a horizontal, clamp parts without pulling the face out of square, and set work offsets that hold from one job to the next.
Inspecting and Prepping the Angle Plate Before Setup
Every error you leave under the base or on the face carries straight into the part. Ten minutes of prep is cheaper than a scrapped first article.
- Stone both faces: Run a flat stone over the base and the vertical face to knock down dings and raised burrs from old clamps. Stone the machine table or pallet too.
- Clean the mating surfaces: Blow off chips, then wipe with a lint-free cloth. One chip under the base tilts the vertical face, and the tilt grows with height.
- Check the plate itself: Set it on a surface plate and check the face against a cylinder square or a known-good master. A plate that has been dropped or overtightened can be out of square before it ever reaches the machine.
- Check the slots and threads: Look for cracked webs, damaged T-slots, and pulled threads on grid-hole plates.
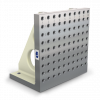
Pick the right plate for the job. Cast iron damps vibration well and is stable over time, which is why the plain, slotted, and grid-face angle plates in our lineup are cast. Grid faces with tapped holes suit modular fixturing and repeat work. Plain faces suit plates you plan to machine with your own fixture pattern.

Setting Up an Angle Plate on a VMC
Position the plate first. Decide which axis the vertical face should run parallel to, usually X, since it gives the longest travel. Keep the plate close to the center of the table when you can, so you are not working at the ends of the travel.
Snug, indicate, then torque. Clamp the base through its slots with T-bolts and clamps, snug enough to hold but loose enough to tap. Mount a 0.0001 in test indicator in the spindle and sweep the vertical face along X. Tap the plate with a dead-blow hammer until the reading is flat, then torque the clamps in an alternating pattern and sweep it again. Clamps almost always move the plate a little.
Check both directions. Sweeping along X proves the face is parallel to the axis. It does not prove the face is perpendicular to the table. Sweep the face up and down in Z as well. If the Z sweep is out, the problem is under the base or in the plate itself, and no amount of tapping fixes it. For precision work, aim for 0.0005 in or better across the usable face in both directions.
If you want a quick refresher on the technique, the Haas Tip of the Day on squaring and indicating a vise uses the same stone, sweep, and tap approach. It applies directly to an angle plate.
Using an Angle Plate on an HMC
On a horizontal, an angle plate usually goes in one of two places: straight on the pallet, or bolted to a tombstone face.
On the pallet, the vertical face points at the spindle, the same way a single-face tombstone would. Mount it through a sub plate if the base slots do not line up with the pallet pattern.
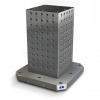
On a tombstone face, the angle plate adds a second clamping surface at 90 degrees to that face. Index the B-axis 90 degrees and you can machine a feature square to the first setup without breaking the part loose. This is a strong option for multi-face parts and secondary datums.
Two HMC-specific checks matter here:
- Use the B-axis to square the face: On a full-contouring B-axis, sweep the face in X, then correct the small angle with a B rotation stored in the work offset instead of tapping a heavy plate on the pallet.
- Recheck swing clearance: An angle plate sticks out farther than the tombstone face does. Add its projection, plus the part, to your swing calculation before the first full index. Our Tombstone City HMC setup guide covers the dry cycle that should follow.
Not sure an angle plate is the right fixture for the job? See angle plate vs. tombstone for when each one makes sense.
Clamping Parts Without Pulling the Plate Out of Square
A square plate can still produce out-of-square parts if the clamping loads distort it or the part.
- Clamp close to the web: The webbed area behind the face is the stiffest. Clamping far out on an unsupported edge lets the face spring under load and spring back when you unclamp.
- Support the overhang: If the part hangs past the plate, put an adjustable parallel or jack under it. Unsupported overhang is the most common source of chatter on angle plate work.
- Locate before you clamp: Use stop pins or a locating bar against the part edge so every part lands in the same place. Then clamp toward the locators, not away from them.
- Even out the torque: Bring clamps up in stages, not one at a time to full torque. Sweep the face again after clamping on thin or long parts.
- Cut with the bottom of the tool: Facing with the end of a shell mill holds squareness better than side milling, which can deflect the tool. Machinist Tom Lipton makes the same point in his write-up on squaring work on a milling machine.
Setting Work Offsets and Making the Setup Repeatable
Use the plate face as your datum. Probe the vertical face for one axis, the top or a locating edge for the second, and the part or plate top for Z. If the part locates off pins on the plate, probe the pins instead, so the offset follows the fixture and not one particular part.
Dowel the plate for repeat jobs. On jobs that come back, add two dowels between the angle plate base and a sub plate, or the pallet. The plate then drops back into the same location without re-indicating, and the stored work offset stays valid. Our accessories include the dowel pins and positioning bushings to do this.
Write it down. Record the plate location, clamp torque, indicator readings, and work offsets for every qualified setup. An undocumented setup is a new setup every time it runs.
Common Angle Plate Setup Mistakes
- Indicating in one direction only: A face can be dead parallel to X and still lean in Z.
- Skipping the second sweep: Torquing the clamps moves the plate. Always sweep after final torque.
- Trusting the plate blindly: Plates get dropped, overtightened, and worn. Check them against a master on a schedule.
- Shimming under the base: Shims compress unevenly and fall out at the next setup. Clean and stone the surfaces instead.
- Forgetting the HMC swing: The angle plate and part project past the tombstone face. Model them before the first index.
Key Takeaways
An angle plate is only as square as its setup. Clean, flat mating surfaces, a two-direction sweep, and clamping close to the web hold most jobs within tolerance on a VMC. On an HMC, an angle plate adds a 90-degree face to a tombstone, as long as you square it with the B-axis and account for its projection in the swing.
Stone the surfaces. Sweep in X and Z. Torque and sweep again. Support the overhang. Dowel the plate for repeat jobs.
Free CAD Files for Every Tombstone City Angle Plate
Plan the setup in CAM before the plate hits the table. Every Tombstone City angle plate has a free STEP model you can place on your machine model, load with your part and clamps, and check for reach and clearance in simulation. Need help choosing a size? Call 631-385-9452 or email info@tombstonecity.com. Browse and download at the Tombstone City CAD Library.